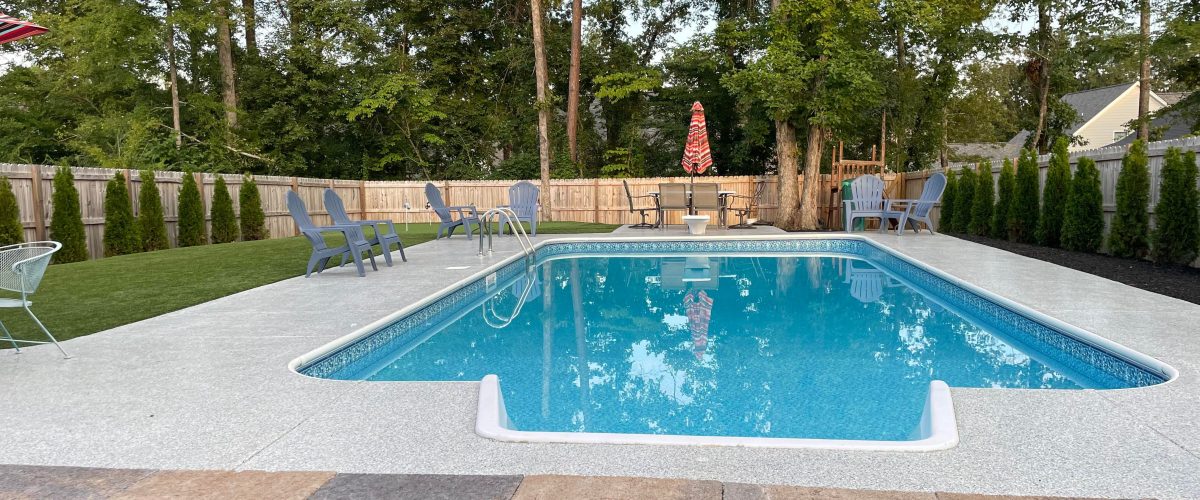
Pool Deck Coating

Pool Deck Coatings That Survive Albany Summers and Winters

Choosing the right pool deck coating matters more in the Capital Region than almost anywhere else. An Albany pool deck has to survive direct UV all summer, pool chemistry every weekend, freeze-thaw cycles all winter, road salt drift from the driveway, and the daily weight of furniture, planters, and foot traffic. The coating that handles all of that without yellowing, cracking, or turning slick is a polyaspartic-topped flake or quartz broadcast system installed over diamond-ground concrete.

It’s UV stable, flexible enough to move with freeze-thaw, slip-resistant when wet, chemical-resistant against chlorine and salt water, and built to last 15-plus years in Capital Region conditions. Below is what an Albany pool deck has to deal with, which coating systems actually hold up, and what makes the difference between a deck that looks great in year ten and a deck that needs to be redone in year three.

Call Epoxy Done Right at 518-543-7699 for a free quote on your pool deck coating.
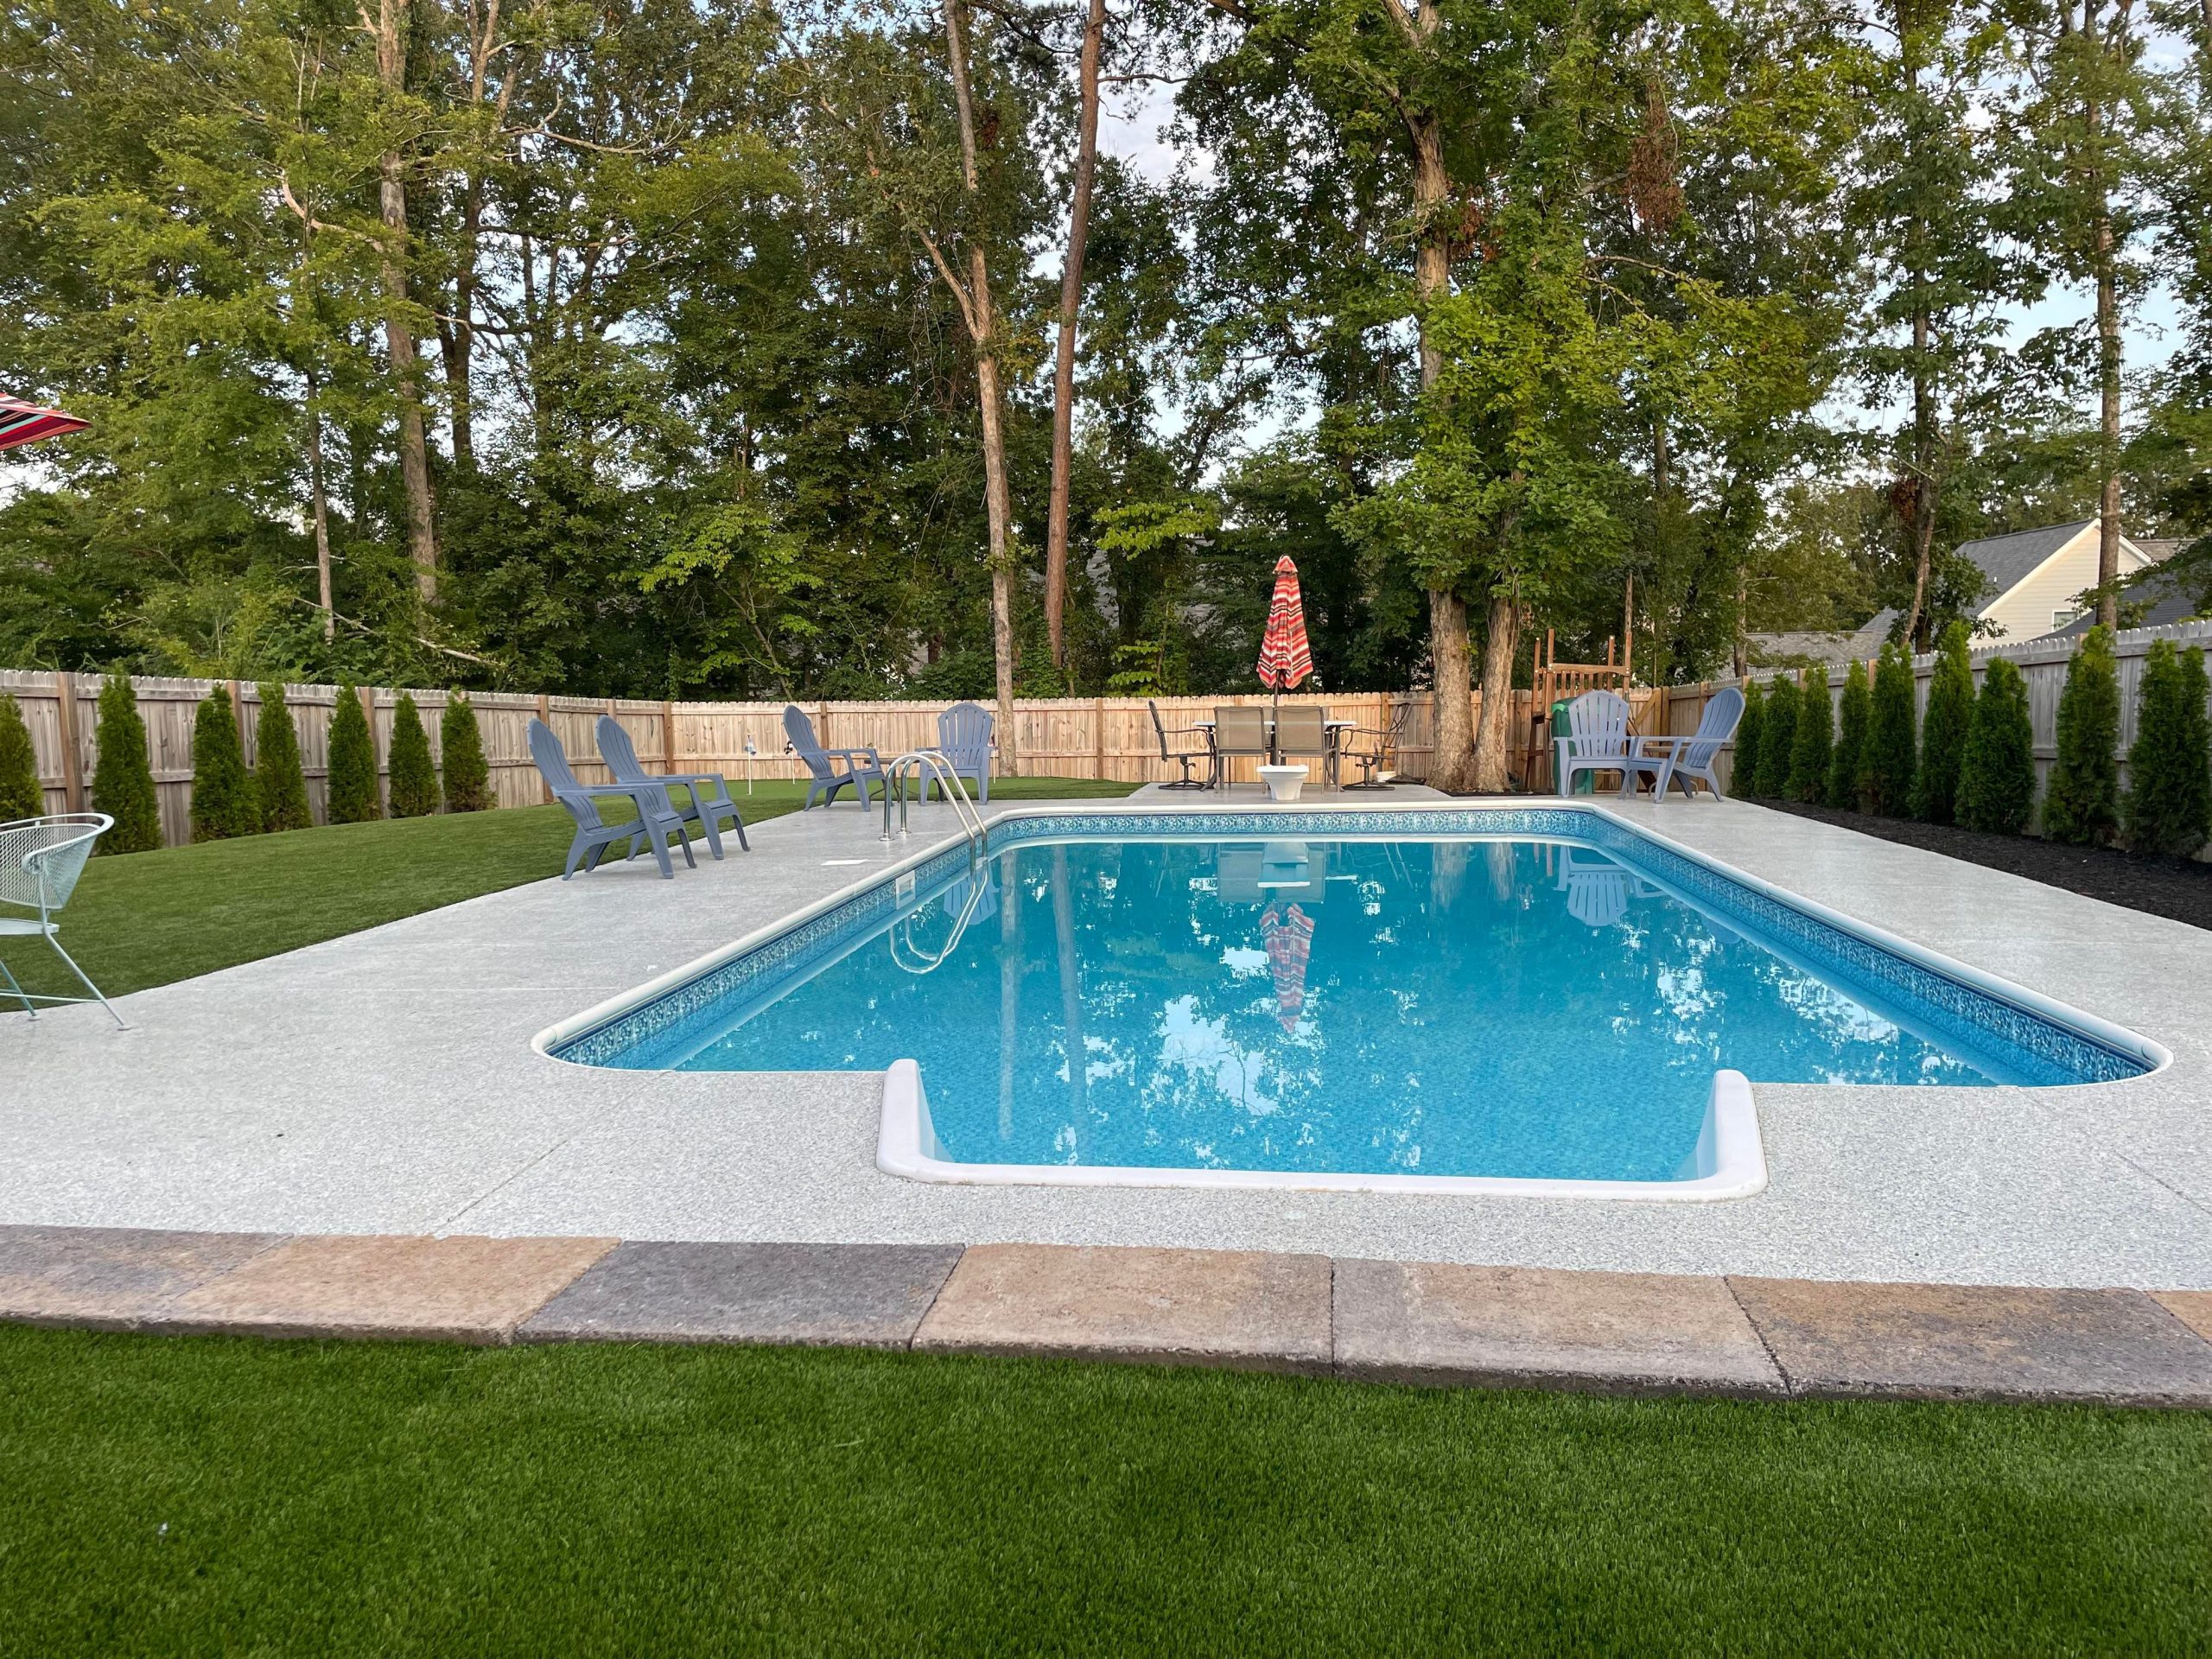
 

Pool Deck Coating

What an Albany Pool Deck Has to Survive

Pool decks in the Capital Region see five distinct stressors in a calendar year. A coating that handles four of them and fails on the fifth is not the right coating.

  • Direct UV all summer. A south-facing deck in Latham can hit 130-plus degrees on a July afternoon. Standard epoxy yellows and chalks under that exposure, often within a single season.
  • Pool chemistry. Chlorine, salt-water pool brine, algaecides, pH adjusters, and the splash and drip of all of it onto the deck day after day. Coatings without real chemical resistance break down.
  • Freeze-thaw cycles all winter. Capital Region winters put pool decks through dozens of expansion and contraction cycles. Rigid coatings crack. Flexible ones flex.
  • Road salt drift. Snow blowing in from the driveway, salt-saturated boots tracking across the deck during spring opening, salt water from a saltwater pool. All of it attacks coatings that are not chloride-resistant.
  • Weight, traffic, and impact. Loungers, tables, planters full of soil, kids running, dropped flip flops, the occasional grill rolled across the deck. The coating has to take the wear without scuffing or telegraphing.

The system that handles all five at once is a flake or quartz broadcast in an epoxy base coat, sealed with a polyaspartic topcoat.

Pool Deck Coating Systems That Actually Work in the Capital Region

Polyaspartic-Topped Flake System

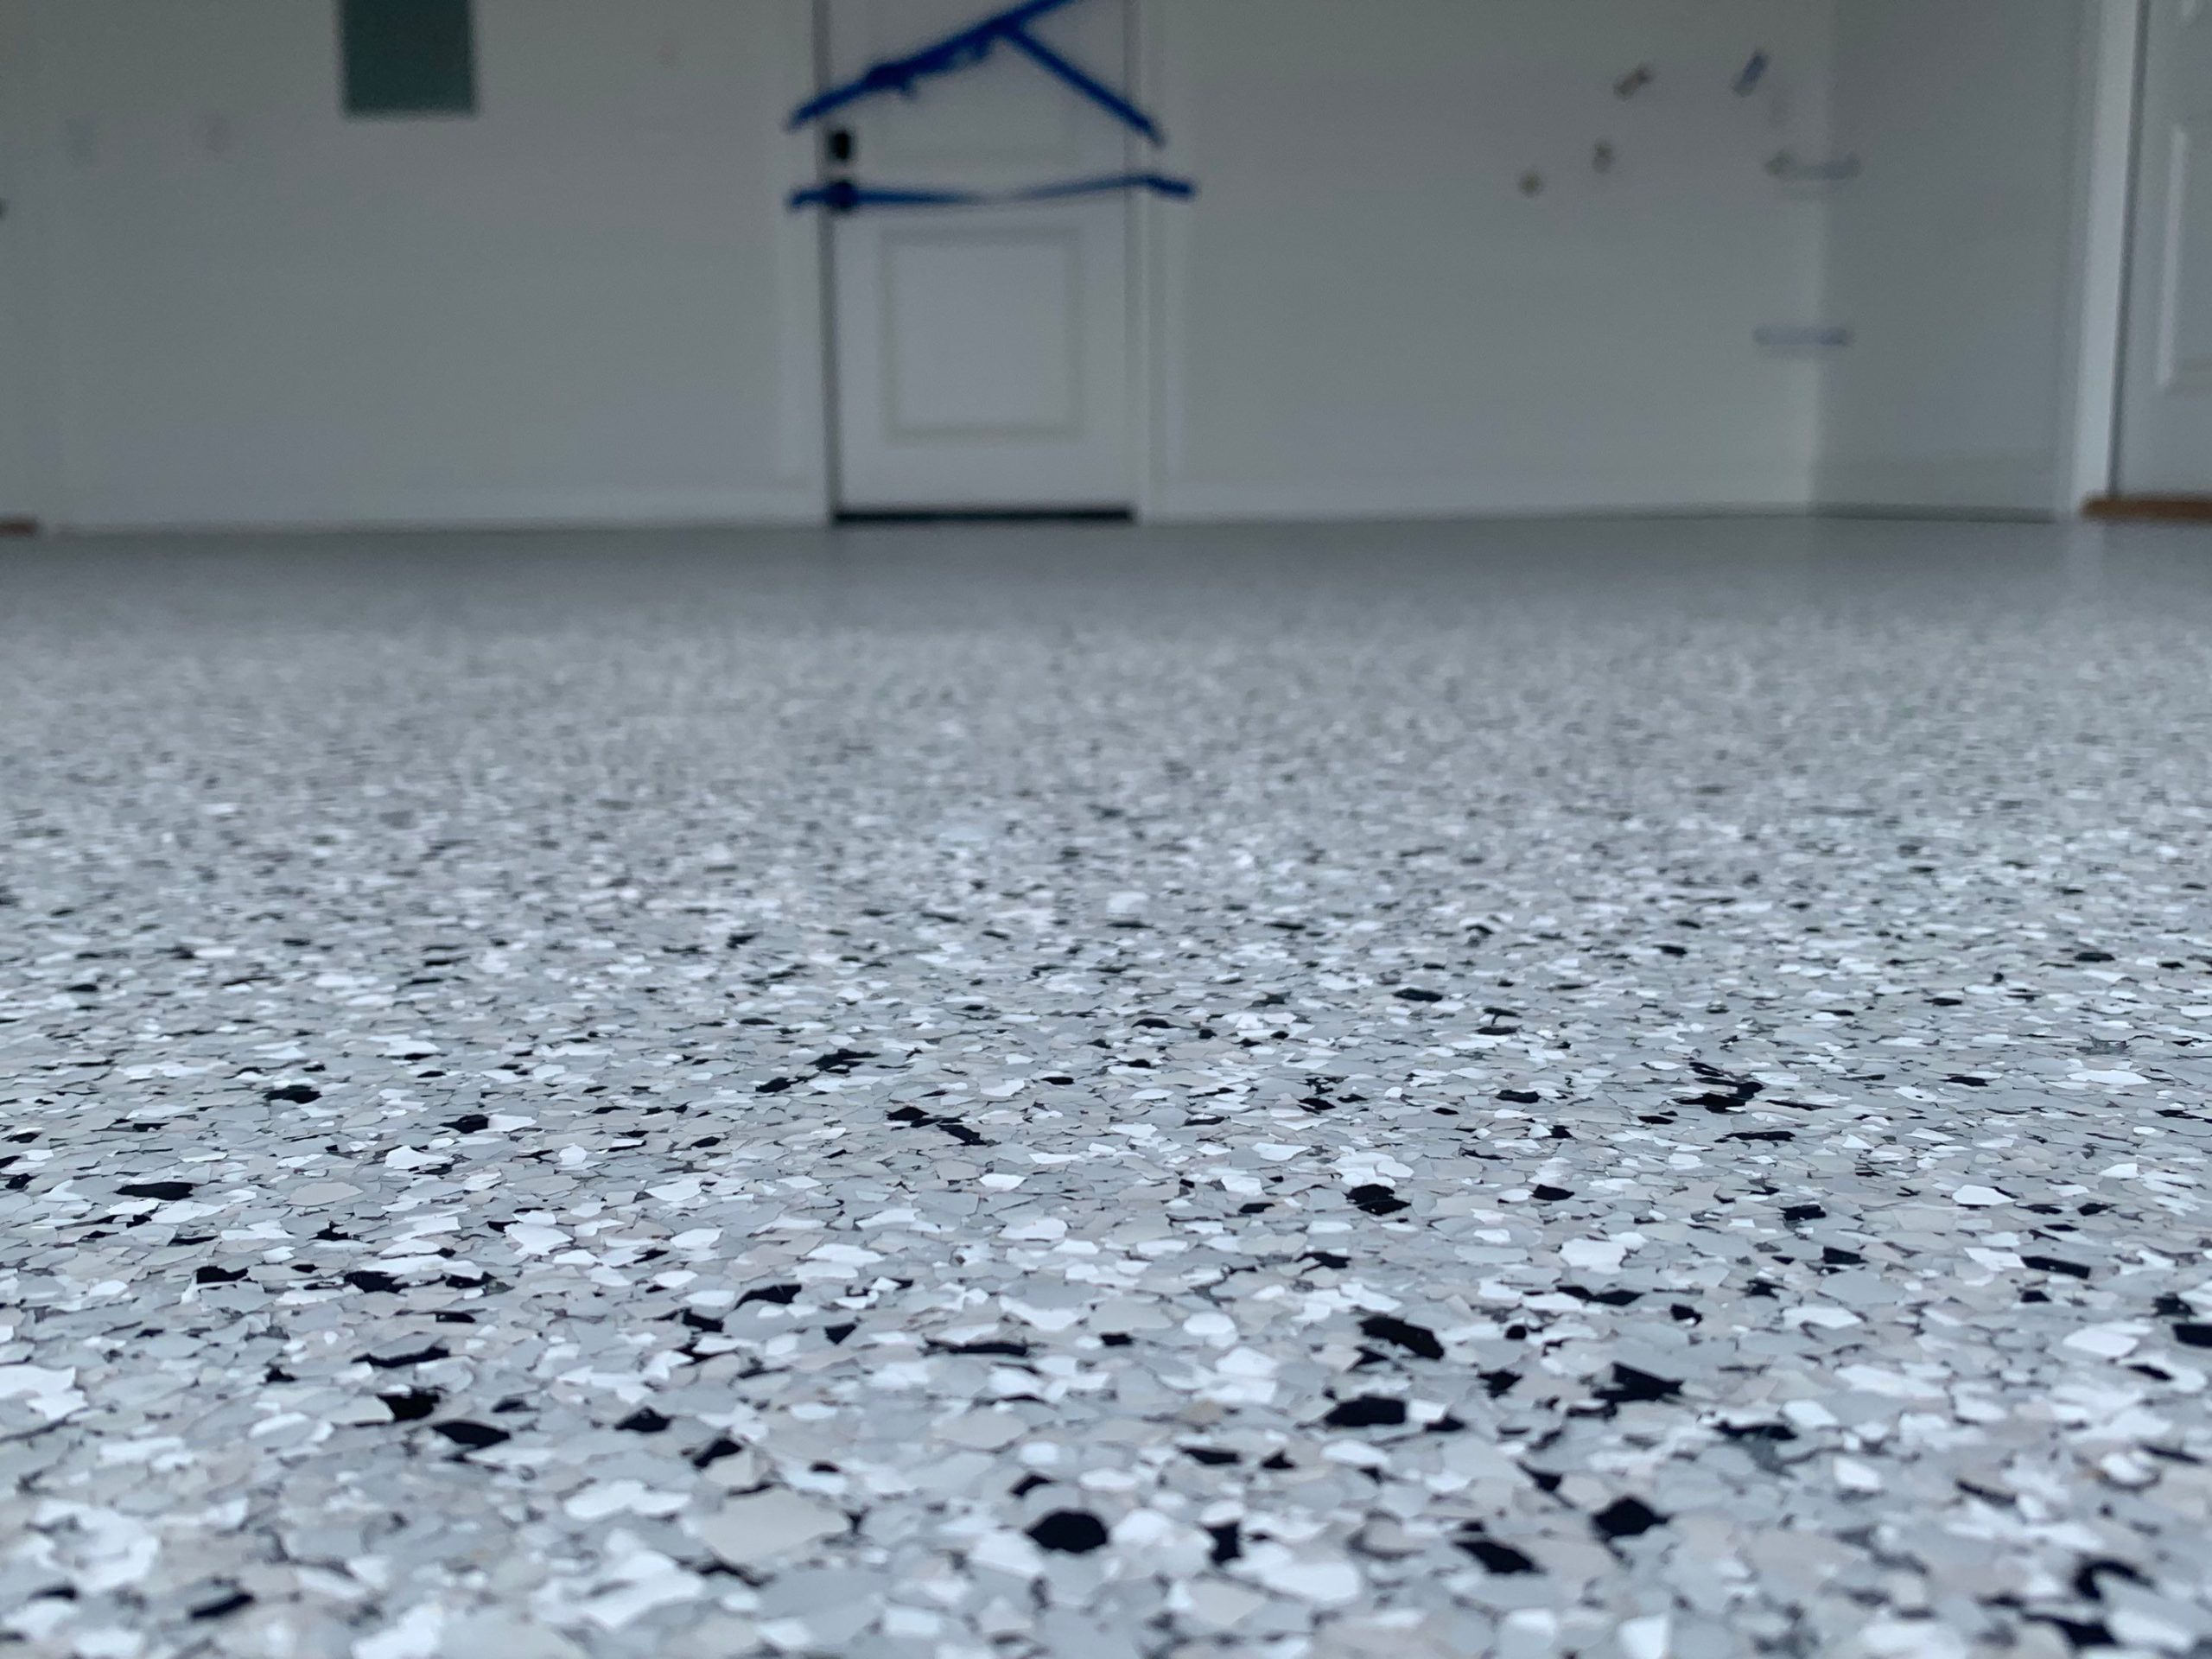
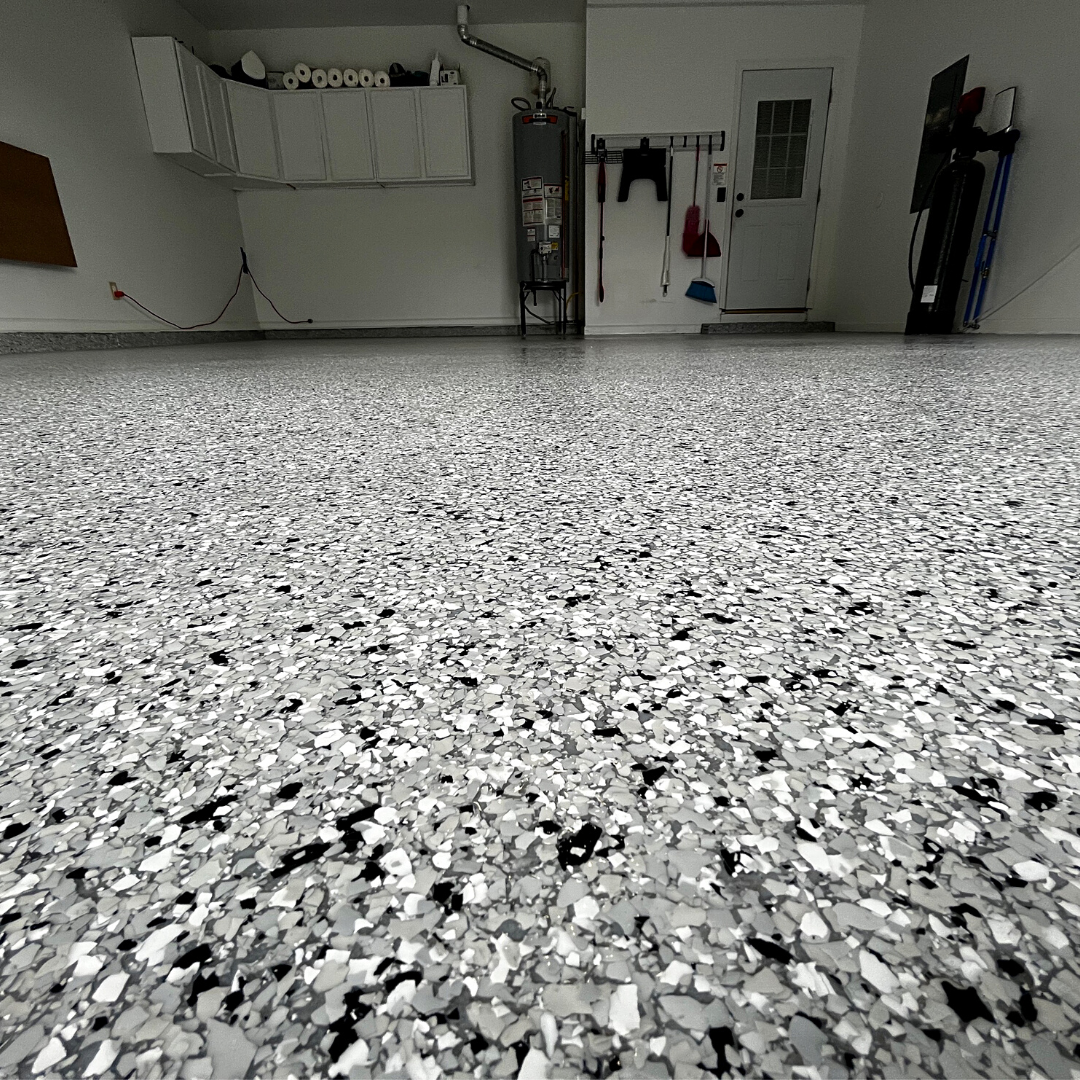
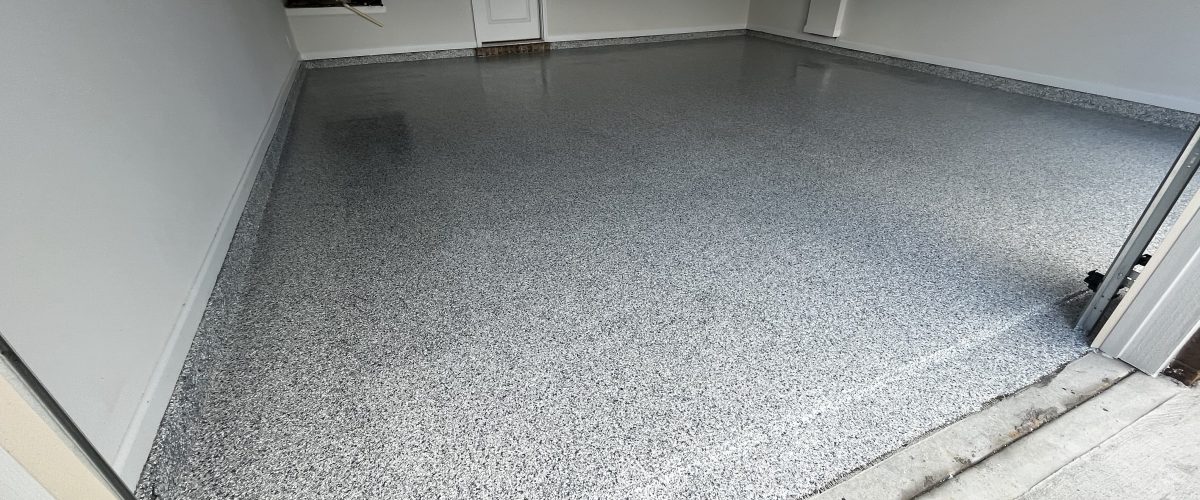
The most common pick for residential pool deck coating in Albany. Vinyl flake is broadcast into a wet epoxy base coat, then sealed with a polyaspartic topcoat. The flake provides color depth, texture for slip resistance, and visual interest. The polyaspartic locks it all in and handles the UV, chemistry, and freeze-thaw work. Best balance of look, durability, and slip resistance for most pool decks.

Polyaspartic-Topped Quartz Broadcast

For decks that need maximum slip resistance or take heavier use, quartz aggregate replaces or supplements the vinyl flake. The result is a more textured, more aggressive surface that holds traction better when soaking wet. Quartz is also more impact-resistant, which matters around outdoor kitchens, hot tubs, and high-traffic walkways.

Solid Color Polyaspartic with Aggregate

A cleaner, more modern look. One continuous color, no flake or quartz pattern, with a fine aggregate broadcast into the topcoat for slip resistance. Best for design-led pools and contemporary homes where the deck is meant to read as one quiet surface.

What Falls Short on Albany Pool Decks

  • Standard single-coat epoxy yellows in months under UV, becomes brittle in cold, and cannot handle chlorine over time.
  • Latex deck paints peel within a season or two from a combination of UV, pool chemistry, and freeze-thaw.
  • Acrylic sealers alone offer color and some protection but no real abrasion resistance and limited slip resistance when wet.

Anything not specifically rated for UV exposure and pool chemistry is going to fail. Read the data sheets, not just the marketing.

Why Polyaspartic Is the Right Topcoat for a Pool Deck

Three properties decide whether a topcoat survives an Albany pool deck, and polyaspartic has all three.

UV stability. Polyaspartic is an aliphatic polyurea, which is the chemistry that does not yellow under sun exposure. A deck coated in 2024 with polyaspartic looks the same color in 2030 as it did on install day. Standard epoxy ambers and fades in months.

Flexibility through freeze-thaw. Polyaspartic stays flexible at low temperatures, so when the slab moves through winter expansion and contraction, the coating moves with it. Rigid epoxy in the same conditions hairline-cracks and eventually peels.

Chemical resistance. Polyaspartic resists chlorine, salt water, pool chemicals, algaecides, sunscreen, and the occasional spilled drink. Wipe-up, no staining, no breakdown.

See the full comparison of coating systems on our epoxy flooring page.

Slip Resistance: How Texture Works on a Wet Deck

A pool deck has to keep its grip when soaking wet. That is non-negotiable, and texture is what delivers it. There are three common texture options, from least to most aggressive:

  1. Fine broadcast aggregate (typically silica or aluminum oxide) added to the polyaspartic topcoat. Subtle texture, comfortable to walk on barefoot, good slip resistance for low-splash decks.
  2. Standard vinyl flake. Mid-range texture from the flake edges themselves. Comfortable barefoot, strong slip resistance, the default choice for most residential pool decks.
  3. Quartz broadcast. Heavier, more aggressive texture. Maximum slip resistance, slightly less comfortable for bare feet over long periods, the right pick for splash-heavy areas and around hot tubs.

Texture choice gets dialed in during the quote. We look at how the deck gets used, who uses it, where the splash happens, and what feels right underfoot.

Color Matters More on a Pool Deck Than Anywhere Else

A dark-colored garage floor is fine. A dark-colored pool deck in full sun can hit surface temperatures that hurt to walk on barefoot. Light and mid-tone colors stay significantly cooler.

Cool deck color guidelines for Capital Region pool decks:

Color range Heat performance
Light tans, beiges, sands, light grays Stay coolest underfoot
Mid-tone grays, blues, greens Stay reasonably cool
Dark grays, browns, charcoal Absorb heat aggressively
True black Can become genuinely too hot to walk on barefoot

Browse color and flake options on our color and flake chart before your walkthrough. We can help you balance the look you want with the surface temperature you actually want underfoot in July.

A flake floor with a polyaspartic topcoat handles the heat, the chlorine, the salt, and the freeze-thaw. The right color choice handles the only other variable: whether you can stand on it barefoot in August.

Prep Is What Decides Whether a Pool Deck Coating Lasts

Coating a pool deck is harder than coating a garage. The slab has been exposed to weather, sun, water, and chemistry for years before you ever touch it. Real prep on an Albany pool deck includes:

  • Pressure washing to remove organic buildup, algae, and surface grime
  • Stripping any existing sealer, paint, or coating
  • Diamond grinding to a Concrete Surface Profile of 2 to 3 across the full deck and edges
  • Chemical neutralization if the deck has had heavy chlorine or salt water exposure that has driven chloride into the slab
  • Crack and joint repair with flexible polyurea fillers
  • Moisture testing before any coating goes down, since pool decks often have high vapor pressure from below
  • Detail vacuuming every inch of the slab before the base coat

A deck that has had a sealer applied annually for ten years needs more aggressive grinding than a bare concrete deck. A saltwater-pool deck needs chemical prep that a chlorine-pool deck does not. The walkthrough establishes what your specific deck needs.

Install Timing and When You Can Use the Pool Again

Best times to schedule a pool deck coating in Albany:

  • Spring (late April through June). Pool is being opened, deck has been sitting under a cover or open all winter, and there is plenty of warm weather ahead.
  • Fall (September into early October). Pool is closing, deck use drops off, conditions are still in the cure window.

Standard timeline for an Albany pool deck install:

Stage Timing
Quote walkthrough 20 to 30 minutes
Day-of install 1 working day (2 for larger or multi-section decks)
Walk-on Same evening
Pool use and full furniture load About 24 hours after the topcoat
Full chemical exposure cure About 72 hours

If you’re opening the pool for Memorial Day weekend, get the deck coated by mid-May. If you’re coating a freshly closed deck in fall, late September works well.

Long-Term Maintenance for a 15-Plus-Year Pool Deck Coating

A properly installed polyaspartic-topped pool deck needs almost no maintenance, but a few habits stretch its life:

  • Rinse off pool chemistry with a hose after major chemical applications instead of letting it sit
  • Sweep regularly during the season so silica from sand toys and sunscreen does not grind into the topcoat
  • Avoid abrasive cleaners — mild soap and water is enough
  • Pull furniture off in fall before snow piles up, and avoid concentrated point loads under heavy snow
  • Inspect annually for any cracks in the slab that have telegraphed through, and address early

That’s the whole maintenance program. No annual resealing, no waxing, no recoating every few years.

Frequently Asked Questions

How much does a pool deck coating cost in Albany? Cost depends on square footage, current deck condition, and the texture/color system chosen (flake, quartz, or solid color). Every quote includes a full walkthrough, and quotes stay valid for three months. Financing is available.

What’s the best pool deck coating for cold climates like Albany? A polyaspartic-topped flake or quartz broadcast system over diamond-ground concrete. Polyaspartic is the only common topcoat that stays flexible through freeze-thaw without yellowing under summer UV.

How long does a polyaspartic pool deck coating last? 15-plus years with normal use and the maintenance habits above, versus a single season or two for latex deck paint or standard epoxy.

Is epoxy or polyaspartic better for a pool deck? Polyaspartic. Standard epoxy yellows under UV and turns brittle in freeze-thaw cycles. Polyaspartic resists both, which is why it’s used as the topcoat over an epoxy base rather than as a standalone pool deck finish. See our full breakdown on epoxy vs. polyaspartic garage floor coatings.

Ready for a Quote on Your Pool Deck Coating?

Call Epoxy Done Right at 518-543-7699. We coat pool decks across Albany, Saratoga, Schenectady, Troy, Clifton Park, Latham, Guilderland, Niskayuna, East Greenbush, and nearby areas in the Capital Region. Every deck gets diamond-ground prep, real crack and joint repair, a UV-stable polyaspartic topcoat over a flake or quartz broadcast system, and our satisfaction guarantee. Quotes stay valid for three months, and financing is available if you want to spread the cost.
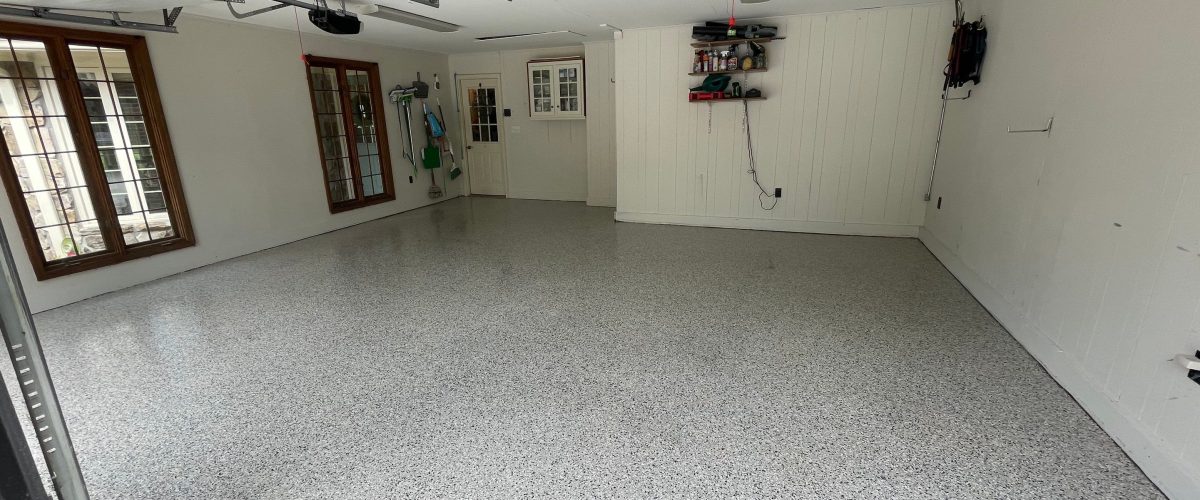
Garage Floor Coating Cost

How to Prep a Concrete Floor for Epoxy Coating

Prepping a concrete floor for epoxy coating is the work that decides whether your floor lasts 15 years or peels in two. The short version: clear the slab; repair any cracks and pitting; mechanically profile the concrete with a diamond grinder to a CSP of 2 to 3; vacuum every speck of dust with a HEPA-rated extractor; moisture-test; and only then apply the coating to a clean, dry, profiled surface. Acid etching alone is not enough for a long-lasting professional finish. Below is the full step-by-step process pros use, along with the mistakes that most often cause DIY prep jobs to fail. Based in Latham, NY, Epoxy Done Right preps and coats concrete floors across the Capital Region. Call 518-543-7699 for a quote.


Why Concrete Prep Matters More Than the Coating

Two contractors can use the same epoxy and produce floors that perform completely differently. The variable is prep. A concrete coating bonds mechanically to the slab, which means the coating physically grabs onto a roughened, porous surface. If the surface is sealed, smooth, dusty, oily, or wet, the coating cannot bond. It sits on top, and within a year or two it lifts.

Industry rule of thumb: prep is 80 percent of the job. Spend the time on the slab and any decent coating will perform well. Skip the prep and even the best coating will fail.

Here are the seven steps, in order.


Step 1: Assess the Slab

Before any tools come out, walk the floor and look for:

  • Cracks, hairline through structural width
  • Spalling and pitting, common on older Capital Region slabs that have seen years of road salt
  • Existing coatings, sealers, or paint that may need stripping
  • Oil and grease stains, especially under where vehicles park
  • Efflorescence, the white powdery residue that signals moisture moving through the slab
  • Visible moisture, dark spots, or condensation patterns

If you see efflorescence or persistent dark patches, you likely have a moisture issue that needs a vapor barrier primer or specialty coating system. Note it and plan around it.


Step 2: Clear the Floor and Strip Existing Coatings

The floor needs to be empty. Move every tool, shelf, and box out. Sweep up all loose debris. If the slab has an existing coating that is peeling, flaking, or poorly bonded, it has to come off before you can put a new system down on top.

Failed coatings are removed by:

  • Mechanical grinding with diamond cup wheels, which is the fastest and cleanest method
  • Shot blasting for very large floors or industrial settings
  • Chemical strippers, which are slow and messy and rarely the right pick for a residential garage

If the floor has heavy oil staining, those areas need to be degreased first. A residential degreaser and a stiff brush handle most cases. Heavy hydraulic or motor oil that has soaked deep into the slab sometimes needs to be ground out.


Step 3: Repair Cracks, Spalls, and Pitting

Once the floor is cleared and stripped, address the damage. This is where Capital Region slabs need extra attention. Older garages in Albany, Schenectady, Saratoga, and Troy often have:

  • Hairline cracks from decades of freeze-thaw
  • Spalled and pitted surfaces from road salt
  • Joint damage at door thresholds and floor drains
  • Settled or low spots near the slab edges

Real prep means using structural patching compounds, not just letting the epoxy itself fill the gaps. The right materials:

  • Polyurea or polymer crack fillers for hairline through medium cracks. They cure fast and flex with the slab.
  • Cementitious patching compounds for larger spalls and pitting.
  • Self-leveling compounds for low spots and uneven areas around drains.

Cracks that are wider than a hairline should be chased, meaning a crack chaser saw widens and squares them slightly so the patching material has something to grip. Filler that just sits on top of a thin crack pops back out within a year.


Step 4: Mechanically Profile the Concrete with Diamond Grinding

This is the single most important step in the whole process. Mechanical profiling does three things at once:

  1. Removes the laitance, the weak, brittle, smooth top layer of concrete that forms during the original cure
  2. Strips any sealer, residue, paint, or contamination still on the surface
  3. Opens the concrete pores so the coating can penetrate and bond

The industry standard target is a Concrete Surface Profile (CSP) of 2 to 3, which feels like medium sandpaper to the touch. The Concrete Surface Profile scale runs 1 (smoothest) to 9 (roughest). Most epoxy and polyaspartic systems specify CSP 2 to 3 in their datasheets.

Pros use:

  • Walk-behind diamond floor grinders with metal-bond diamond cup wheels for the main floor
  • Edge grinders with dust shrouds to handle corners, walls, and tight spots that a walk-behind cannot reach
  • HEPA-rated dust extractors connected to the grinders to capture the silica dust at the source

Edge grinding matters more than people realize. Coating failures most often start at the edges where the prep was lighter. Grind the perimeter properly or expect peeling along the walls within a couple of years.

If a quote does not include diamond grinding, that is not a professional epoxy install. Acid etching alone produces inconsistent profiles, leaves a residue that needs perfect rinsing and drying, and is one of the leading causes of premature coating failure.


Step 5: Vacuum and Clean Thoroughly

After grinding, the floor is covered in fine concrete dust. Even a thin layer of dust acts as a barrier between the slab and the coating, and it leads to pinholes, bubbles, fish eyes, and delamination.

Real cleaning means:

  • HEPA-rated vacuum over the entire floor, including walls and baseboards where dust kicks up
  • Repeat passes in opposite directions
  • Edge detail vacuuming with a crevice tool
  • Final wipe in some specs, with denatured alcohol or a damp rag, to lift the last of the fines

Do not use a leaf blower. It just relocates the dust to the edges of the room where it falls back onto the slab during coating.


Step 6: Test for Moisture

Concrete looks dry on the surface and still pushes water vapor up from below. That vapor pressure is enough to lift a fully cured coating off the slab months after install. Skip this step and you may not see the failure for six months, but it will come.

Standard moisture tests:

  • Calcium chloride test (ASTM F1869). Place a sealed dish of calcium chloride on the slab for 60 to 72 hours and weigh the moisture absorbed. Results in pounds per 1,000 square feet over 24 hours.
  • Relative humidity probe (ASTM F2170). A probe is inserted into a hole drilled in the slab and reads the internal relative humidity.
  • Plastic sheet test. A quick DIY check. Tape a square of plastic to the floor for 24 hours. If condensation forms underneath, you have moisture.

Each coating system has a manufacturer-specified maximum moisture vapor emission rate and relative humidity. If the slab is over the limit, install a vapor barrier primer before the base coat, or pick a system rated for high-moisture conditions.


Step 7: Final Inspection and Coating Application Window

Before the first drop of epoxy goes down, walk the slab one more time:

  • Surface should feel like fine to medium sandpaper
  • No visible dust, residue, or footprints
  • Cracks and spalls all filled and feathered smooth
  • Moisture readings within spec
  • Floor temperature and ambient temperature in the manufacturer’s window (usually 50 to 90 degrees F)
  • Slab temperature at least 5 degrees above the dew point to avoid condensation under the coating

After grinding, you typically want to coat within 24 to 72 hours before dust and humidity start working against you again. If the floor has been pressure-washed during prep (rare for garage installs, more common for outdoor concrete), allow it to fully dry, which can take several days in our climate.


Acid Etching vs Diamond Grinding

Acid etching gets brought up a lot in DIY guides. Here is the honest comparison:

  • Acid etching is inexpensive, requires less equipment, and is what most home improvement store kits recommend. It uses a dilute acid (often muriatic or a phosphoric blend) to lightly bite into the slab surface. The profile it produces is shallow, inconsistent, and never reaches CSP 2 to 3 for most slabs. It also leaves residue that must be neutralized and fully rinsed, and the floor must dry completely before coating.
  • Diamond grinding produces a consistent, controllable profile, removes contamination as it goes, and leaves nothing on the slab that needs neutralizing. It is the only method that consistently produces a CSP 2 to 3 surface across the entire floor.

Every reputable concrete coating manufacturer specifies mechanical profiling for their professional systems. Etching alone is acceptable only for very light-duty single-coat epoxy on a brand-new slab in pristine condition, which is almost no real-world floor.


Common DIY Prep Mistakes

If you are taking a DIY swing at coating a slab, these are the prep mistakes that cause most failures:

  • Skipping the grinder and relying on acid etching or pressure washing alone
  • Coating over an existing peeling coating without stripping it
  • Filling cracks with the epoxy itself instead of using a real patching compound
  • Coating wet concrete that has not been moisture tested
  • Coating in cold weather below the manufacturer’s minimum temperature
  • Not vacuuming thoroughly after grinding
  • Ignoring the edges, where most peeling starts
  • Mixing too much epoxy at once, which kicks before you can spread it

If any of those sound familiar from a coating that failed on you, the issue was prep, not the product.


When to Call a Pro

Concrete prep is doable as a DIY project on a small, clean, single-car attached garage with sound concrete. It becomes a much harder call when:

  • The slab has significant cracks, spalling, or moisture issues
  • The floor is over 600 square feet
  • An existing coating needs to come off
  • You are coating a basement, patio, pool deck, or commercial floor
  • You want a one-day install with a polyaspartic topcoat
  • You want the coating to last 15-plus years instead of 3 to 5

Renting a quality diamond grinder and HEPA extractor for a weekend often costs more than people expect, and the learning curve on profile depth is real. A professional crew can prep, base coat, broadcast flake, and topcoat a typical two-car garage in a single day.


Ready to Skip the Grinder Rental and Get It Done Right?

Call Epoxy Done Right at 518-543-7699 for a quote on your concrete floor in Albany, Saratoga, Schenectady, Troy, Clifton Park, Latham, Guilderland, Utica, or nearby areas. We diamond grind every floor, repair cracks and spalls with structural materials, moisture test where needed, and finish with epoxy flake systems built for Capital Region winters. We also handle garage floors, basements, patios, pool decks, driveways, and commercial floors. Every install is backed by our satisfaction guarantee. See colors on our color chart and know that estimates stay valid for three months.

Pool Deck Coating

Pool Deck Coatings That Survive Albany Summers and Winters

A pool deck in Albany has to survive a lot. Direct UV all summer, pool chemistry every weekend, freeze-thaw cycles all winter, road salt drift from the driveway, and the weight of furniture, planters, and people. The coating that handles all of that without yellowing, cracking, or turning slick is a polyaspartic-topped flake or quartz broadcast system installed over diamond-ground concrete. It is UV stable, flexible enough to move with freeze-thaw, slip-resistant when wet, chemical-resistant against chlorine and salt water, and built to last 15-plus years in Capital Region conditions. Below is what an Albany pool deck has to deal with, which coating systems actually hold up, and what makes the difference between a deck that looks great in year ten and a deck that needs to be redone in year three. Call Epoxy Done Right at 518-543-7699 for a quote on your pool deck coating.


What an Albany Pool Deck Has to Survive

Pool decks in the Capital Region see five distinct stressors in a calendar year. A coating that handles four of them and fails on the fifth is not the right coating.

  • Direct UV all summer. A south-facing deck in Latham can hit 130-plus degrees on a July afternoon. Standard epoxy yellows and chalks under that exposure, often within a single season.
  • Pool chemistry. Chlorine, salt-water pool brine, algaecides, pH adjusters, and the splash and drip of all of it onto the deck day after day. Coatings without real chemical resistance break down.
  • Freeze-thaw cycles all winter. Capital Region winters put pool decks through dozens of expansion and contraction cycles. Rigid coatings crack. Flexible ones flex.
  • Road salt drift. Snow blowing in from the driveway, salt-saturated boots tracking across the deck during spring opening, salt water from a saltwater pool. All of it attacks coatings that are not chloride-resistant.
  • Weight, traffic, and impact. Loungers, tables, planters full of soil, kids running, dropped flip flops, the occasional grill rolled across the deck. The coating has to take the wear without scuffing or telegraphing.

The system that handles all five at once is a flake or quartz broadcast in an epoxy base coat, sealed with a polyaspartic topcoat.


The Coating Systems That Actually Work on Capital Region Pool Decks

Polyaspartic-Topped Flake System

The most common pick for residential pool decks in Albany. Vinyl flake is broadcast into a wet epoxy base coat, then sealed with a polyaspartic topcoat. The flake provides color depth, texture for slip resistance, and visual interest. The polyaspartic locks it all in and handles the UV, chemistry, and freeze-thaw work. Best balance of look, durability, and slip resistance for most pool decks.

Polyaspartic-Topped Quartz Broadcast

For decks that need maximum slip resistance or take heavier use, quartz aggregate replaces or supplements the vinyl flake. The result is a more textured, more aggressive surface that holds traction better when soaking wet. Quartz is also more impact-resistant, which matters around outdoor kitchens, hot tubs, and high-traffic walkways.

Solid Color Polyaspartic with Aggregate

A cleaner, more modern look. One continuous color, no flake or quartz pattern, with a fine aggregate broadcast into the topcoat for slip resistance. Best for design-led pools and contemporary homes where the deck is meant to read as one quiet surface.

What Falls Short on Albany Pool Decks

  • Standard single-coat epoxy yellows in months under UV, becomes brittle in cold, and cannot handle chlorine over time.
  • Latex deck paints peel within a season or two from a combination of UV, pool chemistry, and freeze-thaw.
  • Acrylic sealers alone offer color and some protection but no real abrasion resistance and limited slip resistance when wet.
  • Anything not specifically rated for UV exposure and pool chemistry is going to fail. Read the data sheets, not just the marketing.

Why Polyaspartic Is the Right Topcoat

Three properties decide whether a topcoat survives an Albany pool deck. Polyaspartic has all three.

UV stability. Polyaspartic is an aliphatic polyurea, which is the chemistry that does not yellow under sun exposure. A deck coated in 2024 with polyaspartic looks the same color in 2030 as it did on install day. Standard epoxy ambers and fades in months.

Flexibility through freeze-thaw. Polyaspartic stays flexible at low temperatures, so when the slab moves through winter expansion and contraction, the coating moves with it. Rigid epoxy in the same conditions hairline-cracks and eventually peels.

Chemical resistance. Polyaspartic resists chlorine, salt water, pool chemicals, algaecides, sunscreen, and the occasional spilled drink. Wipe-up, no staining, no breakdown.

The full system breakdown for these and other systems lives on our epoxy flooring page.


Slip Resistance: How Texture Works on a Wet Deck

A pool deck has to keep its grip when soaking wet. That is non-negotiable, and texture is what delivers it.

There are three common texture options, from least to most aggressive:

  • Fine broadcast aggregate (typically silica or aluminum oxide) added to the polyaspartic topcoat. Subtle texture, comfortable to walk on barefoot, good slip resistance for low-splash decks.
  • Standard vinyl flake. Mid-range texture from the flake edges themselves. Comfortable barefoot, strong slip resistance, the default choice for most residential pool decks.
  • Quartz broadcast. Heavier, more aggressive texture. Maximum slip resistance, slightly less comfortable for bare feet over long periods, the right pick for splash-heavy areas and around hot tubs.

Texture choice gets dialed in during the quote. We look at how the deck gets used, who uses it, where the splash happens, and what feels right underfoot.


Color Matters More on a Pool Deck Than Anywhere Else

A dark-colored garage floor is fine. A dark-colored pool deck in full sun can hit surface temperatures that hurt to walk on barefoot. Light and mid-tone colors stay significantly cooler.

Cool deck guidelines for Capital Region pool decks:

  • Light tans, beiges, sands, light grays stay coolest underfoot
  • Mid-tone grays, blues, greens stay reasonably cool
  • Dark grays, browns, charcoal absorb heat aggressively
  • True black can become genuinely too hot to walk on barefoot

Browse color and flake options on our color chart before your walkthrough. We can help you balance the look you want with the surface temperature you actually want underfoot in July.

A flake floor with a polyaspartic topcoat handles the heat, the chlorine, the salt, and the freeze-thaw. The right color choice handles the only other variable, which is whether you can stand on it barefoot in August.


Prep Is What Decides Whether It Lasts

Coating a pool deck is harder than coating a garage. The slab has been exposed to weather, sun, water, and chemistry for years before you ever touch it. Real prep on an Albany pool deck includes:

  • Pressure washing to remove organic buildup, algae, and surface grime
  • Stripping any existing sealer, paint, or coating
  • Diamond grinding to a Concrete Surface Profile of 2 to 3 across the full deck and edges
  • Chemical neutralization if the deck has had heavy chlorine or salt water exposure that has driven chloride into the slab
  • Crack and joint repair with flexible polyurea fillers
  • Moisture testing before any coating goes down, since pool decks often have high vapor pressure from below
  • Detail vacuuming every inch of the slab before the base coat

A deck that has had a sealer applied annually for ten years needs more aggressive grinding than a bare concrete deck. A saltwater-pool deck needs chemical prep that a chlorine-pool deck does not. The walkthrough establishes what your specific deck needs.


Install Timing and When You Can Use the Pool Again

Best times to schedule a pool deck coating in Albany:

  • Spring (late April through June). Pool is being opened, deck has been sitting under a cover or open all winter, and there is plenty of warm weather ahead.
  • Fall (September into early October). Pool is closing, deck use drops off, conditions are still in the cure window.

Standard timeline for an Albany pool deck install:

  1. Quote walkthrough: 20 to 30 minutes
  2. Day-of install: typically one working day for residential decks, two for larger or multi-section decks
  3. Walk-on: same evening
  4. Pool use and full furniture load: about 24 hours after the topcoat
  5. Full chemical exposure cure: about 72 hours

If you are opening the pool for Memorial Day weekend, get the deck coated by mid-May. If you are coating a freshly closed deck in fall, late September works well.


Long-Term Maintenance for a 15-Plus-Year Life

A properly installed polyaspartic-topped pool deck needs almost no maintenance, but a few habits stretch its life:

  • Rinse off pool chemistry with a hose after major chemical applications instead of letting it sit
  • Sweep regularly during the season so silica from sand toys and sunscreen does not grind into the topcoat
  • Avoid abrasive cleaners. Mild soap and water is enough.
  • Pull furniture off in fall before snow piles up. Avoid concentrated point loads under heavy snow.
  • Inspect annually for any cracks in the slab that have telegraphed through. Address early.

That is the whole maintenance program. No annual resealing, no waxing, no recoating every few years.


Ready for a Quote on Your Pool Deck?

Call Epoxy Done Right at 518-543-7699. We coat pool decks across Albany, Saratoga, Schenectady, Troy, Clifton Park, Latham, Guilderland, Niskayuna, East Greenbush, and nearby areas in the Capital Region. Every deck gets diamond-ground prep, real crack and joint repair, a UV-stable polyaspartic topcoat over a flake or quartz broadcast system, and our satisfaction guarantee. Quotes stay valid for three months, and financing is available if you want to spread the cost.
Warrensburg epoxy flooring New Paltz

Why Spring Is the Best Time to Coat Your Garage Floor in Albany

Spring (April through June) is the best time to coat a garage floor in Albany, NY. The temperature and humidity settle into the range coatings cure best in, the road salt from winter is gone, scheduling is easier before the summer rush, and you get the full warm-weather season to actually use the new floor. Modern polyaspartic chemistry means we install year-round in the Capital Region, including winter, but if you have flexibility on timing, spring is the sweet spot. Below is the full breakdown of why, what each season actually looks like for an Albany install, and how early you should be calling to lock in a spring date. Call Epoxy Done Right at 518-543-7699 for a quote.


Four Reasons Spring Wins in Albany

1. The Temperature and Humidity Are in the Sweet Spot

Coatings cure best between 55 and 90 degrees F with moderate humidity. Albany springs deliver that range almost on autopilot. Late April through June, daytime temperatures sit between 55 and 80 most days, humidity is moderate, and rainfall is steady but not constant. That gives the coating system room to breathe during application and cure without fighting extreme heat, extreme cold, or the heavy humidity of July and August.

2. The Salt and Slush Are Gone

By April, the road salt season in the Capital Region is winding down. By May it is over. Coating a floor right after the salt stops means the new finish gets six full months of clean conditions before it has to face the next winter. That first season is when the polyaspartic topcoat fully cures and seasons in, and a clean, salt-free environment is the best possible context for that.

Coating in November means the floor goes from cure to road salt almost immediately. It will still hold up, but spring gives the coating a genuinely easier start.

3. Scheduling Is Easier Before the Summer Rush

July and August are peak season for almost every concrete coating contractor in the Capital Region. Lead times stretch out, calendars fill, and the same window you could have had in May might be three or four weeks out by mid-summer. Calling in February or March for a May or June install almost always gets you the date you want.

4. You Get the Whole Warm Season to Use It

A floor coated in May is ready for the garage to be used hard for the next six months. Spring cleaning, summer projects, fall organization, holiday prep. By the time winter rolls back around, the coating is fully cured, seasoned, and ready to take road salt without issues. A floor coated in October technically works, but you spend the first six months looking at it under a layer of slush.


What the Coating Actually Needs from the Weather

Every coating system, including the most modern polyaspartic, has a temperature and humidity window. Stay inside the window and the coating cures correctly, bonds tight, and looks the way it is supposed to look. Push the edges and you get cure problems.

The specifics for most professional systems:

  • Slab temperature: 50 to 90 degrees F
  • Ambient air temperature: 55 to 90 degrees F
  • Slab temperature must be at least 5 degrees above the dew point to avoid condensation forming under the coating
  • Humidity: ideally below 80 percent, lower is better

In the Capital Region, mid-April through mid-June hits all four targets the highest percentage of days. Late September through mid-October is a close second. Both are real windows. Spring just edges fall because of the salt timing and the season ahead.


How Each Season Plays Out for an Albany Install

Spring (Best)

Temperature and humidity in range almost every day from late April on. Salt season over. Scheduling open. Six months of warm weather ahead. Garage doors can be left open during install for airflow without bugs or extreme heat. Cure conditions are about as good as the Capital Region offers.

Summer (Good with Caveats)

Warm enough, but Albany summers can pull humidity into the 80s and 90s percent, especially July through mid-August. High humidity slows polyaspartic cure and can cause surface blush on epoxy. Heat itself is rarely the issue. Humidity is. Mornings and evenings work better than mid-afternoon installs in peak summer. Scheduling tightens as the season goes on.

Fall (Strong Runner-Up)

September and early October are excellent. Cool nights pull humidity down, and the slab temperature stays in range during the day. The risk is the rolling calendar. By late October, slab temperatures start dropping into the 40s overnight, and early frost can push the next morning’s slab below the cure threshold. Doable, but the window narrows fast.

Winter (Year-Round with Polyaspartic)

This is where polyaspartic chemistry matters. Polyaspartic cures across a much wider temperature range than standard epoxy, including down into the 30s and 40s if the slab is conditioned correctly. A heated garage, even temporarily heated with portable equipment, gives you cure conditions year-round. We do winter installs in Albany. They work. The tradeoff is that you give up the salt-free first season and you are working around weather closures.


Why Polyaspartic Chemistry Changes the Conversation

Older epoxy-only systems had narrow windows. Air temperature needed to sit between 60 and 80, slab over 55, humidity under 70 percent, and cure took 3 to 7 days at those conditions. That essentially limited installs to late spring and early fall in Upstate New York.

Polyaspartic topcoats cure in 24 hours, function across a much wider temperature band, and are far less humidity sensitive once down. The polyaspartic chemistry is what makes one-day installs possible and what makes winter installs in heated garages routine.

That said: wider window does not mean every day is equal. Spring is still optimal. Polyaspartic just removes the seasons-where-you-cannot-install problem, not the seasons-that-are-best problem.

Polyaspartic lets us install year-round in Albany. Spring is still the season we recommend if you have flexibility on the calendar.


How Early to Book for Spring

Working backward from a desired install date:

  • For a May install: Call in February or early March
  • For a June install: Call by mid-April at the latest
  • For an April install: Call in January or early February

Our quotes stay valid for three months, so a quote written in February can hold for a May install without issue. That is part of why we built the three-month window in the first place: it lets people plan an early-spring install while the weather is still locked in winter mode.

If your slab needs significant prep (an existing failed coating, heavy spalling, moisture issues that need testing) add an extra two to four weeks to the booking window so we can schedule the prep walkthrough and a full-day install.


What You Can Do Right Now to Be Ready

Whether you are reading this in January planning ahead or in April ready to pull the trigger, a few steps help an install go smoothly:

  1. Walk your garage and note the condition. Cracks, spalling, peeling paint, oil stains, anywhere water has been getting in.
  2. Measure the slab. Length and width. This lets us write an accurate quote faster.
  3. Pick a color direction. Browse our color chart before the walkthrough. You do not have to commit, but having a starting point speeds the conversation.
  4. Plan to clear the garage. The slab needs to be empty for grinding. If you need help moving heavy items, ask when you call.
  5. Decide on financing or full pay up front. Financing is available if you want to spread the cost across months.

Call to Lock in Your Spring Install

518-543-7699. We serve Albany, Saratoga, Schenectady, Troy, Clifton Park, Latham, Guilderland, Niskayuna, East Greenbush, Utica, and nearby areas across the Capital Region. We diamond grind every slab, install flake systems with an epoxy base and a polyaspartic topcoat built for Capital Region winters, and most installs wrap in a single day. Quotes are valid for three months, which gives you time to plan around your schedule. Every install is backed by our satisfaction guarantee.

Pittsfield concrete floor in Hudson NY

9 Tips for Choosing the Best Epoxy Floor Contractors for Your Home Renovation

Choosing the best epoxy floor contractors for your home renovation means focusing on experience, surface preparation, material quality, customization options, and proven local results. In Upstate New York, your contractor must also understand freeze-thaw cycles, moisture conditions, and concrete wear common throughout the Capital Region.

If you live in Albany, Latham, Saratoga Springs, Clifton Park, Queensbury, Lake George, Kingston, or nearby areas, the right epoxy flooring specialist will properly grind and repair your concrete, install premium-grade coatings, and deliver a seamless floor built for long-term performance.

Epoxy flooring is not just a cosmetic upgrade. It is a durable, moisture-resistant system designed to protect and elevate your space for years.


Why Choosing the Right Epoxy Floor Contractor Matters

Epoxy flooring systems depend on precise installation. Even premium materials can fail if preparation is rushed or incomplete.

A qualified epoxy flooring contractor understands:

  • How to evaluate concrete condition and moisture levels
  • Why mechanical diamond grinding is critical for adhesion
  • How to repair cracks and surface imperfections properly
  • Which coating system fits your space and daily use
  • How to apply UV-stable, protective topcoats

In Upstate New York, concrete surfaces face road salt, humidity changes, and seasonal temperature swings. When installed correctly, epoxy flooring creates a seamless, easy-to-clean surface that resists chemicals, abrasion, and heavy traffic.

Preparation determines durability.


Experience With Residential Epoxy Flooring

Not all epoxy contractors specialize in residential home renovations.

Ask how many garage floors, basements, and interior epoxy systems they have completed in the Capital Region. Residential projects require attention to design detail, cleanliness, and finish quality that differs from industrial work.

Look for experience with:

  • Garage floor coatings
  • Basement epoxy flooring
  • Decorative flake systems
  • Metallic epoxy finishes

Surface Preparation Methods

Proper surface preparation is the foundation of long-lasting epoxy flooring.

The best epoxy floor contractors use:

  • Mechanical diamond grinding
  • Crack and joint repair
  • Thorough dust-controlled cleaning

Grinding creates the correct surface profile for strong adhesion, which is especially important in older Upstate New York homes.

Avoid minimal prep methods that skip mechanical grinding.


Quality of Epoxy Materials

Material quality directly impacts performance.

High-performance epoxy systems should:

  • Resist moisture and hot tire pickup
  • Provide strong adhesion
  • Maintain color and gloss over time
  • Include UV-stable protective topcoats

In climates like Upstate New York, premium materials help your floors handle seasonal stress without premature wear.


Customization Options

Your epoxy flooring should complement your renovation goals.

Look for contractors who offer:

  • Solid color epoxy systems
  • Decorative flake blends
  • Metallic epoxy finishes
  • Custom color combinations

Design flexibility allows your garage, basement, or living area to feel finished and intentional.


Clear and Detailed Pricing

Professional epoxy floor contractors provide written estimates outlining:

  • Surface preparation
  • Concrete repairs
  • Coating layers
  • Project timeline

Clear documentation reflects professionalism and helps you compare proposals confidently.


Local Reputation in the Capital Region

Reviews from homeowners in Albany, Latham, Saratoga Springs, Clifton Park, Queensbury, Lake George, and Kingston provide meaningful insight.

Look for consistent feedback about:

  • Attention to detail
  • Professional communication
  • Clean job sites
  • Projects completed on schedule

Local reputation matters when investing in your home.


Clean and Organized Job Sites

A professional epoxy contractor protects your home during installation.

Ask about:

  • Dust control systems
  • Wall and surface protection
  • Daily cleanup procedures

Clean job sites often reflect disciplined workmanship.


Step-by-Step Installation Process

Experienced contractors clearly explain their process.

A typical residential epoxy flooring installation includes:

  1. Consultation and site evaluation
  2. Moisture testing and concrete assessment
  3. Mechanical grinding and crack repair
  4. Base coat application
  5. Decorative flake or metallic layer if selected
  6. Protective topcoat
  7. Final walkthrough and inspection

Clear process transparency builds confidence.


Communication and Responsiveness

Strong communication leads to smoother renovation projects.

Evaluate:

  • Response time
  • Scheduling clarity
  • Willingness to answer detailed questions
  • Professionalism during consultation

Contractors who communicate well typically deliver organized, predictable results.


Common Mistakes to Avoid

Choosing Based Only on Price

Lower pricing often reflects reduced prep work or lower-grade materials. Proper installation supports long-term durability.

Skipping Moisture Testing

Basements and garages in Upstate New York frequently experience moisture exposure. Professional testing helps prevent coating failure.

Ignoring Design Planning

Consider color, texture, and finish so your new floor enhances your overall renovation.

Hiring Without Reviewing Past Projects

Always request photos of completed epoxy flooring installations in your area.


Frequently Asked Questions

How long does residential epoxy flooring last?

When professionally installed with proper surface preparation, epoxy flooring can last many years under normal residential use.

How long does installation take?

Most residential garage or basement epoxy flooring projects take one to three days, depending on size and condition.

Is epoxy flooring good for Upstate New York winters?

Yes. Properly installed epoxy flooring resists moisture, road salt, and temperature fluctuations common in the Northeast.

Can epoxy flooring be customized?

Yes. You can choose from solid colors, decorative flake blends, and metallic finishes to match your space.


Upgrade Your Concrete Floors With Confidence

If you are planning a home renovation in Albany, Latham, Saratoga Springs, Clifton Park, Queensbury, Lake George, Kingston, or nearby Capital Region communities, choosing the best epoxy floor contractors makes all the difference.

Epoxy Done Right is locally owned and operated in Latham, NY. The team specializes in garage flooring, residential and commercial epoxy flooring, polished concrete, grind and seal systems, and microcement finishes. You receive premium materials, precise mechanical preparation, and a clean, organized installation process tailored to your space.

Call us at 518-543-7699

How to Clean Epoxy Floors: 7 Expert Maintenance Tips to Keep Them Looking New

How to Clean Epoxy Floors: 7 Expert Maintenance Tips to Keep Them Looking New

Cleaning epoxy floors does not need to be complicated. Stick with a simple routine, use the right products, and clean up messes quickly. Sweep every few days, mop with a mild solution once a week, and clean spills right away. Whether it is a garage or an interior space, this approach keeps your epoxy floors looking clean, smooth, and long-lasting.

A simple, consistent routine is what keeps epoxy floors looking their best year after year.

1. Sweep Regularly to Prevent Surface Damage

Dust and small debris might not seem like a big deal, but over time, they can leave fine scratches on the surface.

Use a soft broom or dust mop every few days to keep buildup under control. It is one of the easiest ways to protect the finish and maintain that clean, polished look.

2. Use a Gentle Cleaning Solution

When it comes to the best cleaner for epoxy floors, less is more. You do not need anything harsh to get great results.

Simple cleaning mix:

  • 2 to 3 ounces of ammonia per gallon of water
  • Apply with a microfiber mop
  • Rinse lightly if needed

This kind of solution lifts dirt without leaving behind residue or dulling the surface.

3. Mop Consistently for a Clean Finish

Once the loose dirt is gone, mopping brings the floor back to life.

Use warm water and a mild cleaner. There is no need to soak the floor. A damp mop will do the job and help maintain the coating without overdoing it.

4. Clean Spills as Soon as They Happen

Epoxy floors are resistant to stains, but that does not mean spills should sit for long.

Keep an eye out for:

  • Oil and grease
  • Chemicals
  • Winter salt and moisture

Wipe up spills with a soft cloth, then rinse the area. It only takes a minute and helps keep the surface looking fresh.

5. Avoid Harsh Chemicals and Abrasives

Some cleaners can do more harm than good.

Try to avoid:

  • High concentrations of vinegar
  • Citrus or acid-based cleaners
  • Soap-heavy products that leave a film
  • Rough scrubbers

Sticking with gentle epoxy floor cleaning products will help preserve the finish and extend the life of your floor.

6. Use Soft Tools to Protect the Surface

The tools you use matter just as much as the cleaner.

Go with:

  • Microfiber mops
  • Soft-bristle brooms
  • Gentle scrub pads

These options clean effectively without scratching or wearing down the topcoat.

7. Deep Clean Periodically to Maintain Shine

Regular cleaning handles most of the work, but a deeper clean every few months helps keep everything looking sharp.

Every few months:

  • Use a slightly stronger diluted solution
  • Lightly scrub areas that need extra attention
  • Rinse thoroughly

This helps remove any buildup and keeps the floor looking close to new.

How to Clean Epoxy Garage Floors

Garage floors usually take more abuse from vehicles, dirt, and changing weather.

For a clean epoxy garage floor:

  • Sweep or blow out dust and debris
  • Spot clean oil stains with a gentle degreaser
  • Mop with warm water and a mild cleaner
  • Rinse to clear away salt and residue

In the Capital Region of New York, seasonal changes can be tough on floors, so staying consistent really pays off.

Cleaning epoxy floors, Innovative Concrete Floor Solutions Niskayuna
About epoxy done right

What to Avoid When Cleaning Epoxy Floors

Avoiding a few common mistakes can make a big difference over time.

Do not:

  • Use steel wool or stiff brushes
  • Let dirt sit for long periods
  • Flood the floor with water
  • Apply wax or polish

Keeping things simple usually leads to better results.

How Long Epoxy Floors Last With Proper Maintenance

With the right care, epoxy floors can last for many years and still look great.

A lot of that comes down to how the floor was installed. Proper prep work and high-quality materials make cleaning easier and help the surface hold up over time.

Ricardo gomez angel rO6709B116E unsplash scaled

Frequently Asked Questions

Polished concrete is created by grinding the surface with increasingly fine diamond abrasives. The process results in a smooth, glossy finish with customizable levels of sheen and aggregate exposure.

Absolutely. Its durability, style, and low maintenance make it perfect for homes, offices, stores, restaurants, warehouses, and more.

Polished concrete is a cost-effective alternative to luxury flooring like hardwood or natural stone. Plus, it offers long-term savings thanks to its durability and minimal maintenance needs.

Maintenance is simple. Regular dust or wet mopping with a neutral pH cleaner is usually all it takes. There's no need for waxing or coatings—just clean spills promptly to prevent stains.

Get Professional Epoxy Flooring That’s Built to Last

If you want a floor that is easy to clean and holds its appearance, the installation process matters just as much as the maintenance.

Epoxy Done Right installs custom epoxy flooring using premium materials and detailed surface preparation to ensure long-term performance. Every project is handled with care and built for durability. We are serving Latham, Albany, Saratoga Springs, Clifton Park, Queensbury, Lake George, Kingston, and nearby areas.

Call 518-543-7699 to get started with epoxy flooring designed to look great and stay easy to maintain.

Epoxy Garage Floor Cost Guide 2026: What You’ll Actually Pay (+ Price Breakdown by Type)

Epoxy Garage Floor Cost Guide 2026: What You’ll Actually Pay (+ Price Breakdown by Type)

If you’re planning an epoxy garage floor in 2026, here’s what most homeowners actually pay: $4 to $12 per square foot, with a typical 2-car garage landing somewhere between $7,000 and $12,000 when installed professionally.

In Latham, Albany, and across the Capital Region, pricing often sits on the higher end. That comes down to labor standards and, more importantly, the level of prep work needed to make the floor last.

Quick cost snapshot:

Per square foot: $4 to $12
1-car garage: $3,000 to $6,000
2-car garage: $7,000 to $12,000
3-car garage: $10,000 to $18,000+

What really drives the price is not just the coating. It is the preparation underneath it.

Average Epoxy Garage Floor Cost in 2026

Pricing has become more consistent over the years, but there is still a noticeable range depending on how the floor is installed and what system you choose.

Typical price ranges:

Type of Installation

Cost Per Sq Ft

Typical Total (2-Car Garage)

DIY Epoxy Kit

$2 to $5

$1,000 to $3,000

Basic Professional

$5 to $7

$5,000 to $8,000

Mid-Range System

$7 to $10

$7,000 to $12,000

Premium System

$10 to $12+

$10,000 to $15,000+

Most professional installations include grinding, crack repair, multiple coating layers, and a protective topcoat. That extra work is what makes the floor hold up over time.

Garage floor cost great barrington

Epoxy Garage Floor Cost by Type

Not all epoxy floors are the same. The system you choose has a direct impact on both price and performance.

Solid Color Epoxy

  • Cost: $4 to $7 per sq ft
  • Look: Clean and uniform
  • Best for: Straightforward, functional garages

This is usually the most budget-friendly professional option.

Flake or Chip Epoxy Systems

  • Cost: $6 to $10 per sq ft
  • Look: Textured with multiple tones
  • Best for: Most residential garages

Flake systems are popular for a reason. They add grip and do a great job hiding small imperfections in the concrete.

Metallic Epoxy Floors

  • Cost: $9 to $12+ per sq ft
  • Look: Glossy, custom, high-end
  • Best for: Showrooms or standout spaces

These floors take more time and skill to install, which is why they cost mor

DIY Epoxy Kits

  • Cost: $2 to $5 per sq ft
  • Reality: Lower durability

DIY kits can save money upfront, but many start to show wear after a few years, especially if the prep work is limited.

What Actually Affects Epoxy Garage Floor Cost

A few key factors determine where your project will fall within the price range.

Surface Preparation

This is the part most people overlook, and it is the most important.

Proper prep includes:

  • Mechanical grinding
  • Crack and damage repair
  • Moisture testing
  • Deep cleaning

If the prep is not done right, the coating will not last.

This is why higher-quality installations cost more upfront.

Garage Size

Bigger garages cost more overall, but the price per square foot can sometimes drop slightly due to efficiency.

Condition of Existing Concrete

  • Cracks or pitting increase labor
  • Oil stains and moisture need extra treatment
  • Older concrete usually needs more prep

Coating System and Thickness

Thicker, multi-layer systems cost more but give you:

  • Better durability
  • Longer lifespan
  • Stronger resistance to wear and chemicals

Design and Customization

Custom colors, blends, and metallic finishes will raise both material and labor costs.

Cleaning epoxy floors, Innovative Concrete Floor Solutions Niskayuna

Real Epoxy Garage Floor Cost Examples

Here is what real projects often look like based on garage size.

1-Car Garage (200 to 300 sq ft)

  • Basic system: $3,000 to $5,000
  • Mid-range flake: $4,000 to $6,000

2-Car Garage (400 to 500 sq ft)

  • Basic system: $5,000 to $8,000
  • Flake system: $7,000 to $12,000
  • Metallic system: $9,000 to $14,000

3-Car Garage (600 to 800 sq ft)

  • Basic system: $3,000 to $5,000
  • Mid-range flake: $4,000 to $6,000

High-End Custom Garage

  • Decorative or metallic system
  • Extensive prep work

Typical range: $15,000 to $25,000+

DIY vs Professional Epoxy Garage Floor Cost

At first glance, DIY looks like the cheaper route. Over time, that is not always the case.

DIY Epoxy

  • Lower upfront cost
  • Limited prep
  • Often lasts around 3 to 5 years depending on use

Professional Installation

  • Higher upfront cost
  • Full prep and multi-layer system
  • Typically lasts 10 to 20 years with proper care

In many cases, the professional option ends up being the better value long term.

Latham
About epoxy done right

How to Get an Accurate Epoxy Floor Quote

No two garages are exactly the same, so pricing can vary even within the same neighborhood.

A proper quote should include:

  • A close look at the concrete condition
  • Accurate measurements
  • Moisture testing if needed
  • A clear plan for the finish and system

That way, you are getting a floor built specifically for your space.

Is Epoxy Flooring Worth the Cost?

For many homeowners, this is less about cost and more about what you get out of it.

You end up with:

  • A cleaner, more finished look
  • Easier maintenance
  • Strong resistance to stains and wear
  • A garage that feels more usable

Done right, it completely changes how your garage looks and functions.

Ricardo gomez angel rO6709B116E unsplash scaled

Frequently Asked Questions

Polished concrete is created by grinding the surface with increasingly fine diamond abrasives. The process results in a smooth, glossy finish with customizable levels of sheen and aggregate exposure.

Absolutely. Its durability, style, and low maintenance make it perfect for homes, offices, stores, restaurants, warehouses, and more.

Polished concrete is a cost-effective alternative to luxury flooring like hardwood or natural stone. Plus, it offers long-term savings thanks to its durability and minimal maintenance needs.

Maintenance is simple. Regular dust or wet mopping with a neutral pH cleaner is usually all it takes. There's no need for waxing or coatings—just clean spills promptly to prevent stains.

Get a Quote for Your Garage Floor

If you’re planning an epoxy garage floor in Latham, Albany, Saratoga Springs, Clifton Park, or anywhere in the Capital Region and nearby areas, the best next step is to get a professional evaluation of your space.

Epoxy Done Right takes the time to properly prepare your concrete, uses high-performance coating systems, and builds each floor around how you actually use your garage. That approach is what helps your floor last and look better over time.

Call (518) 543-7699 to schedule your consultation and get clear, honest pricing for your project.