
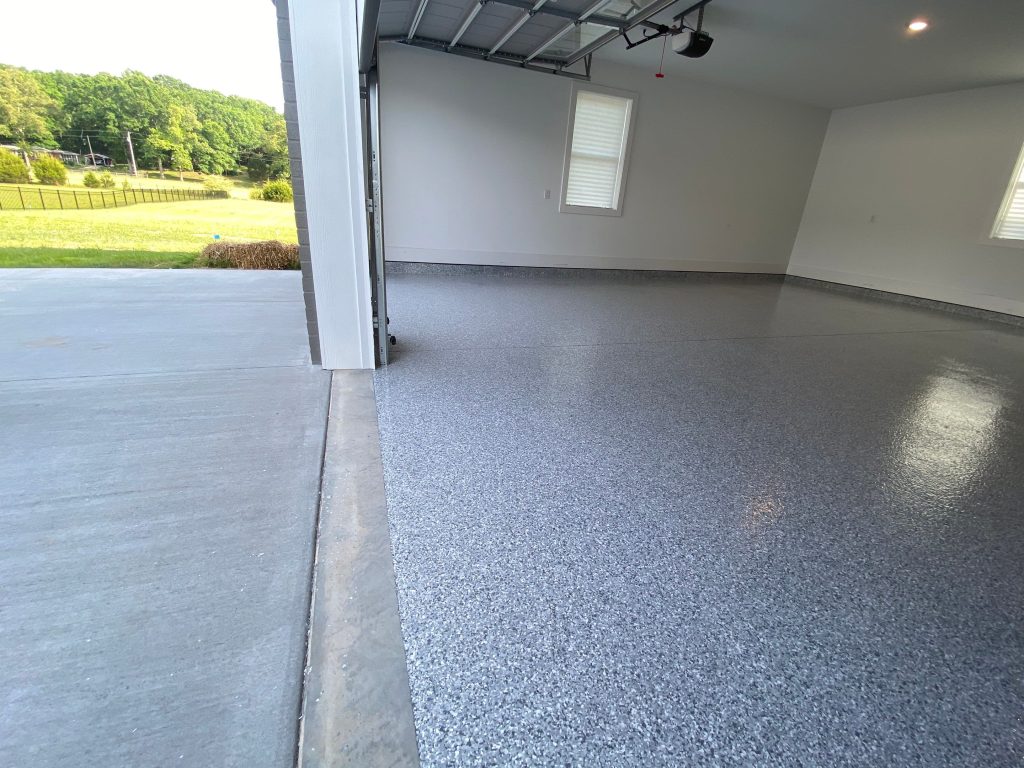
On installation day, our crew arrives, clears and preps your garage, mechanically grinds the concrete, repairs cracks, then applies the base coat, broadcasts decorative flake, and seals everything under a UV-stable protective topcoat before a final walkthrough with you. Most residential garage floors are completed in a single day, and many are ready to walk on that evening with vehicle traffic back on the floor a short time later. The order matters: each step sets up the next, and the grinding and crack repair at the start are what make the finish bond and last. Here is exactly what to expect from start to finish, and the little bit of prep that helps the day go smoothly.
Before the Crew Arrives
You do not need to do much, but a few things help install day move fast:
- Clear the floor: Move cars, storage, shelving, and anything else off the slab so the crew has full access
- Note any problem spots: Point out cracks, pitting, oil stains, or areas that stay damp so we can address them
- Plan your parking: Keep vehicles off the floor for the day and through the cure window we give you
That is it. Once the space is clear, the crew handles the rest. See what a finished result looks like on our garage floor coatings page.
Step 1: Surface Prep and Mechanical Grinding
Everything starts with prep, because a coating is only as good as the concrete underneath it. We mechanically grind the entire slab to open the surface, remove old sealers or coatings, and create the profile the new coating needs to bond into rather than sit on top of. This is the single most important step and the one DIY kits skip. Learn more about our concrete surface preparation and grinding service.
Step 2: Crack Repair and Cleaning
With the floor ground, cracks, pits, and surface flaws are filled and addressed so nothing telegraphs through the finished coating. The slab is then cleaned thoroughly, since any dust or debris left behind weakens the bond. This is where our concrete repair and crack filling work pays off in a smooth, even final surface.
Step 3: Base Coat Application
Now the coating goes down. We apply the base coat evenly across the prepped slab, working in sections so coverage stays consistent. This layer is the foundation of the system and the anchor for the decorative flake that follows.
Step 4: Decorative Flake or Color
While the base coat is still wet, we hand-broadcast the decorative flake across the floor for even, full coverage. This is the step that gives the floor its speckled, finished look and its texture. If you chose a solid or metallic system instead, this is where that finish is built. You picked the blend during your consultation, so the color scheme comes together exactly as planned.
Step 5: Protective Topcoat
Once the flake is set, we seal everything under a UV-stable, moisture-resistant topcoat. This is the layer that faces daily life: it locks in the flake, resists salt and stains, keeps the color from ambering in sunlight, and gives the floor its durability and easy-clean surface. It is also why a professional floor behaves so differently from a big-box kit over time. Many garages use a fast-curing polyaspartic topcoat, which is a big part of how we finish in a single day.
Step 6: Final Inspection and Walkthrough
Before we call the job done, we do a quality-control review of the whole floor and walk it with you. You see the finished result, we cover care and cure times, and we make sure the space is left clean and organized, which is how we treat every job site.
One day, done right. Most residential garage floors go from bare slab to finished coating in a single day, without cutting a single corner on prep.
How Long It Takes and When You Can Use It
Most standard residential garages are completed in one day, start to finish. Cure times depend on the system and the weather, but with a fast-curing polyaspartic topcoat, many floors are ready for foot traffic the same evening and vehicle traffic a short time later. We give you the exact cure window for your floor at the walkthrough so you know precisely when to move everything back in. Learn more about our one-day floor coating installation.
Garage Floor Coating Process Questions
How long before I can park on my new garage floor?
With a fast-curing polyaspartic topcoat, many floors are ready for foot traffic the same evening and vehicle traffic a short time later. Exact cure times depend on the system and the weather, so we give you the precise cure window for your floor at the final walkthrough.
Do I need to move everything out of the garage first?
Yes. Clearing cars, storage, and shelving off the slab before the crew arrives gives us full access and helps install day move quickly. Everything can move back in once the cure window we give you has passed.
Can you coat a garage floor in winter?
Often, yes. Polyaspartic systems cure fast even in cooler temperatures, which makes year-round installation possible in many cases. We confirm conditions and timing for your specific garage during the consultation.
Ready to Coat Your Garage Floor?
Now that you know what install day looks like, the rest is easy. Epoxy Done Right handles the full process start to finish with meticulous prep, premium-grade materials, UV-stable topcoats, and clean, organized job sites, most of it in a single day.
We coat garage floors throughout Albany, Clifton Park, Saratoga Springs, and nearby Capital Region communities. Call 518-543-7699 to schedule your installation and talk through the right system for your garage.