
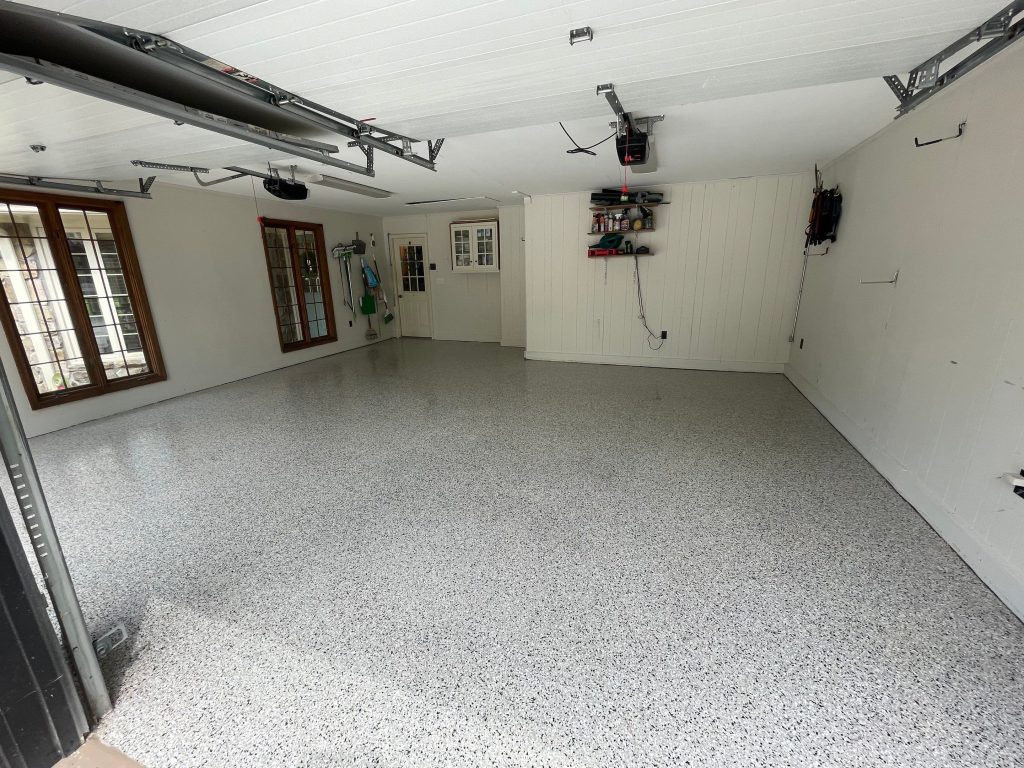
Prepping a concrete floor for epoxy coating is the work that decides whether your floor lasts 15 years or peels in two. The short version: clear the slab; repair any cracks and pitting; mechanically profile the concrete with a diamond grinder to a CSP of 2 to 3; vacuum every speck of dust with a HEPA-rated extractor; moisture-test; and only then apply the coating to a clean, dry, profiled surface. Acid etching alone is not enough for a long-lasting professional finish. Below is the full step-by-step process pros use, along with the mistakes that most often cause DIY prep jobs to fail. Based in Latham, NY, Epoxy Done Right preps and coats concrete floors across the Capital Region. Call 518-543-7699 for a quote.
Why Concrete Prep Matters More Than the Coating
Two contractors can use the same epoxy and produce floors that perform completely differently. The variable is prep. A concrete coating bonds mechanically to the slab, which means the coating physically grabs onto a roughened, porous surface. If the surface is sealed, smooth, dusty, oily, or wet, the coating cannot bond. It sits on top, and within a year or two it lifts.
Industry rule of thumb: prep is 80 percent of the job. Spend the time on the slab and any decent coating will perform well. Skip the prep and even the best coating will fail.
Here are the seven steps, in order.
Step 1: Assess the Slab
Before any tools come out, walk the floor and look for:
- Cracks, hairline through structural width
- Spalling and pitting, common on older Capital Region slabs that have seen years of road salt
- Existing coatings, sealers, or paint that may need stripping
- Oil and grease stains, especially under where vehicles park
- Efflorescence, the white powdery residue that signals moisture moving through the slab
- Visible moisture, dark spots, or condensation patterns
If you see efflorescence or persistent dark patches, you likely have a moisture issue that needs a vapor barrier primer or specialty coating system. Note it and plan around it.
Step 2: Clear the Floor and Strip Existing Coatings
The floor needs to be empty. Move every tool, shelf, and box out. Sweep up all loose debris. If the slab has an existing coating that is peeling, flaking, or poorly bonded, it has to come off before you can put a new system down on top.
Failed coatings are removed by:
- Mechanical grinding with diamond cup wheels, which is the fastest and cleanest method
- Shot blasting for very large floors or industrial settings
- Chemical strippers, which are slow and messy and rarely the right pick for a residential garage
If the floor has heavy oil staining, those areas need to be degreased first. A residential degreaser and a stiff brush handle most cases. Heavy hydraulic or motor oil that has soaked deep into the slab sometimes needs to be ground out.
Step 3: Repair Cracks, Spalls, and Pitting
Once the floor is cleared and stripped, address the damage. This is where Capital Region slabs need extra attention. Older garages in Albany, Schenectady, Saratoga, and Troy often have:
- Hairline cracks from decades of freeze-thaw
- Spalled and pitted surfaces from road salt
- Joint damage at door thresholds and floor drains
- Settled or low spots near the slab edges
Real prep means using structural patching compounds, not just letting the epoxy itself fill the gaps. The right materials:
- Polyurea or polymer crack fillers for hairline through medium cracks. They cure fast and flex with the slab.
- Cementitious patching compounds for larger spalls and pitting.
- Self-leveling compounds for low spots and uneven areas around drains.
Cracks that are wider than a hairline should be chased, meaning a crack chaser saw widens and squares them slightly so the patching material has something to grip. Filler that just sits on top of a thin crack pops back out within a year.
Step 4: Mechanically Profile the Concrete with Diamond Grinding
This is the single most important step in the whole process. Mechanical profiling does three things at once:
- Removes the laitance, the weak, brittle, smooth top layer of concrete that forms during the original cure
- Strips any sealer, residue, paint, or contamination still on the surface
- Opens the concrete pores so the coating can penetrate and bond
The industry standard target is a Concrete Surface Profile (CSP) of 2 to 3, which feels like medium sandpaper to the touch. The Concrete Surface Profile scale runs 1 (smoothest) to 9 (roughest). Most epoxy and polyaspartic systems specify CSP 2 to 3 in their datasheets.
Pros use:
- Walk-behind diamond floor grinders with metal-bond diamond cup wheels for the main floor
- Edge grinders with dust shrouds to handle corners, walls, and tight spots that a walk-behind cannot reach
- HEPA-rated dust extractors connected to the grinders to capture the silica dust at the source
Edge grinding matters more than people realize. Coating failures most often start at the edges where the prep was lighter. Grind the perimeter properly or expect peeling along the walls within a couple of years.
If a quote does not include diamond grinding, that is not a professional epoxy install. Acid etching alone produces inconsistent profiles, leaves a residue that needs perfect rinsing and drying, and is one of the leading causes of premature coating failure.
Step 5: Vacuum and Clean Thoroughly
After grinding, the floor is covered in fine concrete dust. Even a thin layer of dust acts as a barrier between the slab and the coating, and it leads to pinholes, bubbles, fish eyes, and delamination.
Real cleaning means:
- HEPA-rated vacuum over the entire floor, including walls and baseboards where dust kicks up
- Repeat passes in opposite directions
- Edge detail vacuuming with a crevice tool
- Final wipe in some specs, with denatured alcohol or a damp rag, to lift the last of the fines
Do not use a leaf blower. It just relocates the dust to the edges of the room where it falls back onto the slab during coating.
Step 6: Test for Moisture
Concrete looks dry on the surface and still pushes water vapor up from below. That vapor pressure is enough to lift a fully cured coating off the slab months after install. Skip this step and you may not see the failure for six months, but it will come.
Standard moisture tests:
- Calcium chloride test (ASTM F1869). Place a sealed dish of calcium chloride on the slab for 60 to 72 hours and weigh the moisture absorbed. Results in pounds per 1,000 square feet over 24 hours.
- Relative humidity probe (ASTM F2170). A probe is inserted into a hole drilled in the slab and reads the internal relative humidity.
- Plastic sheet test. A quick DIY check. Tape a square of plastic to the floor for 24 hours. If condensation forms underneath, you have moisture.
Each coating system has a manufacturer-specified maximum moisture vapor emission rate and relative humidity. If the slab is over the limit, install a vapor barrier primer before the base coat, or pick a system rated for high-moisture conditions.
Step 7: Final Inspection and Coating Application Window
Before the first drop of epoxy goes down, walk the slab one more time:
- Surface should feel like fine to medium sandpaper
- No visible dust, residue, or footprints
- Cracks and spalls all filled and feathered smooth
- Moisture readings within spec
- Floor temperature and ambient temperature in the manufacturer’s window (usually 50 to 90 degrees F)
- Slab temperature at least 5 degrees above the dew point to avoid condensation under the coating
After grinding, you typically want to coat within 24 to 72 hours before dust and humidity start working against you again. If the floor has been pressure-washed during prep (rare for garage installs, more common for outdoor concrete), allow it to fully dry, which can take several days in our climate.
Acid Etching vs Diamond Grinding
Acid etching gets brought up a lot in DIY guides. Here is the honest comparison:
- Acid etching is inexpensive, requires less equipment, and is what most home improvement store kits recommend. It uses a dilute acid (often muriatic or a phosphoric blend) to lightly bite into the slab surface. The profile it produces is shallow, inconsistent, and never reaches CSP 2 to 3 for most slabs. It also leaves residue that must be neutralized and fully rinsed, and the floor must dry completely before coating.
- Diamond grinding produces a consistent, controllable profile, removes contamination as it goes, and leaves nothing on the slab that needs neutralizing. It is the only method that consistently produces a CSP 2 to 3 surface across the entire floor.
Every reputable concrete coating manufacturer specifies mechanical profiling for their professional systems. Etching alone is acceptable only for very light-duty single-coat epoxy on a brand-new slab in pristine condition, which is almost no real-world floor.
Common DIY Prep Mistakes
If you are taking a DIY swing at coating a slab, these are the prep mistakes that cause most failures:
- Skipping the grinder and relying on acid etching or pressure washing alone
- Coating over an existing peeling coating without stripping it
- Filling cracks with the epoxy itself instead of using a real patching compound
- Coating wet concrete that has not been moisture tested
- Coating in cold weather below the manufacturer’s minimum temperature
- Not vacuuming thoroughly after grinding
- Ignoring the edges, where most peeling starts
- Mixing too much epoxy at once, which kicks before you can spread it
If any of those sound familiar from a coating that failed on you, the issue was prep, not the product.
When to Call a Pro
Concrete prep is doable as a DIY project on a small, clean, single-car attached garage with sound concrete. It becomes a much harder call when:
- The slab has significant cracks, spalling, or moisture issues
- The floor is over 600 square feet
- An existing coating needs to come off
- You are coating a basement, patio, pool deck, or commercial floor
- You want a one-day install with a polyaspartic topcoat
- You want the coating to last 15-plus years instead of 3 to 5
Renting a quality diamond grinder and HEPA extractor for a weekend often costs more than people expect, and the learning curve on profile depth is real. A professional crew can prep, base coat, broadcast flake, and topcoat a typical two-car garage in a single day.
Ready to Skip the Grinder Rental and Get It Done Right?
Call Epoxy Done Right at 518-543-7699 for a quote on your concrete floor in Albany, Saratoga, Schenectady, Troy, Clifton Park, Latham, Guilderland, Utica, or nearby areas. We diamond grind every floor, repair cracks and spalls with structural materials, moisture test where needed, and finish with epoxy flake systems built for Capital Region winters. We also handle garage floors, basements, patios, pool decks, driveways, and commercial floors. Every install is backed by our satisfaction guarantee. See colors on our color chart and know that estimates stay valid for three months.